Introduction
This article is a copy of the original posted on LinkedIn. My previous article I introduced the concept of using Pi Hole software running on the Raspberry Pi as a Cyber Security tool. This undertaking was part of a capstone project to complete a recent course. Pi Hole is effectively ‘DNS Sinkholing’ software.
A DNS sinkhole can be a very effective tool when it comes to thwarting malware attacks. Every day, unwitting users click on a link to a malicious domain. It prevents devices from connecting to bad domains in the first place. Configuring the DNS server to supply a false IP address redirects the client elsewhere. It’s a simple but surprisingly effective tool in your arsenal to proactively protect your network using DNS.
A DNS sinkhole is a specific example of a false telemetry system (aka sinkhole server, internet sinkhole, and blackhole DNS). It can also be used to protect users from visiting known malicious or phishing sites. Thus, DNS sinkholes can be used for both malicious and investigative and defensive purposes.
This article will cover how to install Pi Hole on a Raspberry Pi. The tutorial assumes that you have flashed your MicroSD card with Raspbian and have it up and running.
Methodology
- Install Pi Hole on Raspberry Pi – to be covered by this article
- Create Ubuntu Server in Cloud
- Install Splunk on Ubuntu Server.
- Install Splunk Universal Forwarder on Raspberry Pi.
- Accessing Splunk Pi Hole App.
Installing Pi Hole on Raspberry Pi:
Connect the Raspberry Pi to your Router via Ethernet Cable and switch it on.
If necessary, you may need to logon to your router to reserve the IP address of the Raspberry Pi. Your router DHCP lease may run out and the result will be that the IP address of your Raspberry Pi will change. By reserving the IP address of the Pi on the router it will effectively stay the same. This will be important later when configuring devices on your network to use the ‘Pi Hole’.
If you are using a Mac you can access the Pi using the Terminal and via the SSH command.
Simply type: ssh pi@ipaddress and use the default login name and password for your Raspberry Pi. If using Windows you can use PuTTY.
Once logged in: use the commands:
sudo apt-get-update
sudo apt-get upgrade -y
To install Pi Hole: curl -sSL https://install.pi-hole.net | bash

Choose eth0 as the interface to use with Pi-hole. Press Tab to move the red highlight to Ok and then press Enter. This is our Gigabit Ethernet port which will provide the best possible connection.
Select your upstream DNS provider. We chose Google, but there are many others to choose from. Press Tab and then Enter.

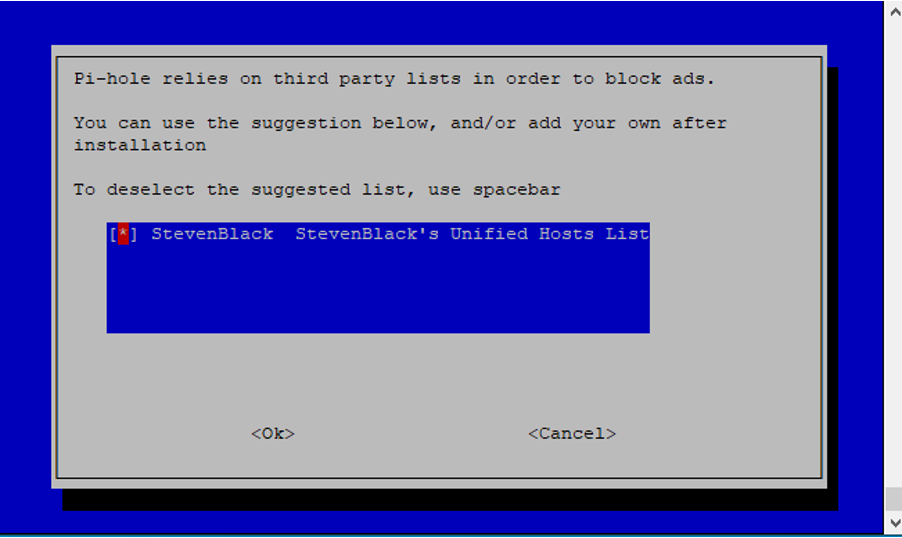
Accept the default list of blocked sites by pressing tab and enter.
Accept the default IPv4 and IPv6 protocols by pressing tab and enter.

Accept the current network settings and set them as static. Do make a note of the details as we will need them later.

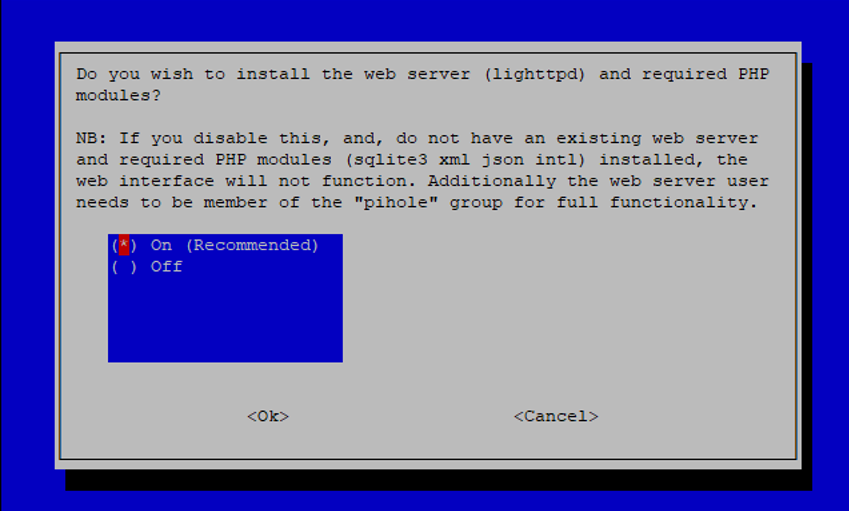
Install the web admin interface by pressing tab and enter.

Install the lighttpd web server used to serve the web admin pages by pressing tab and enter.
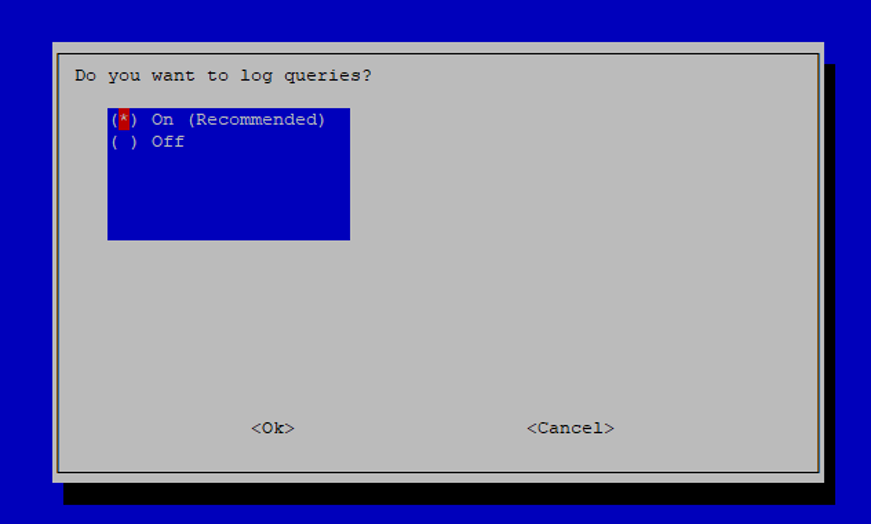
Accept the default log options.
Accept the default privacy mode by pressing tab and enter.

The installation is complete and the final page recaps the IP address of the Pi-hole device and provides an admin webpage login password.
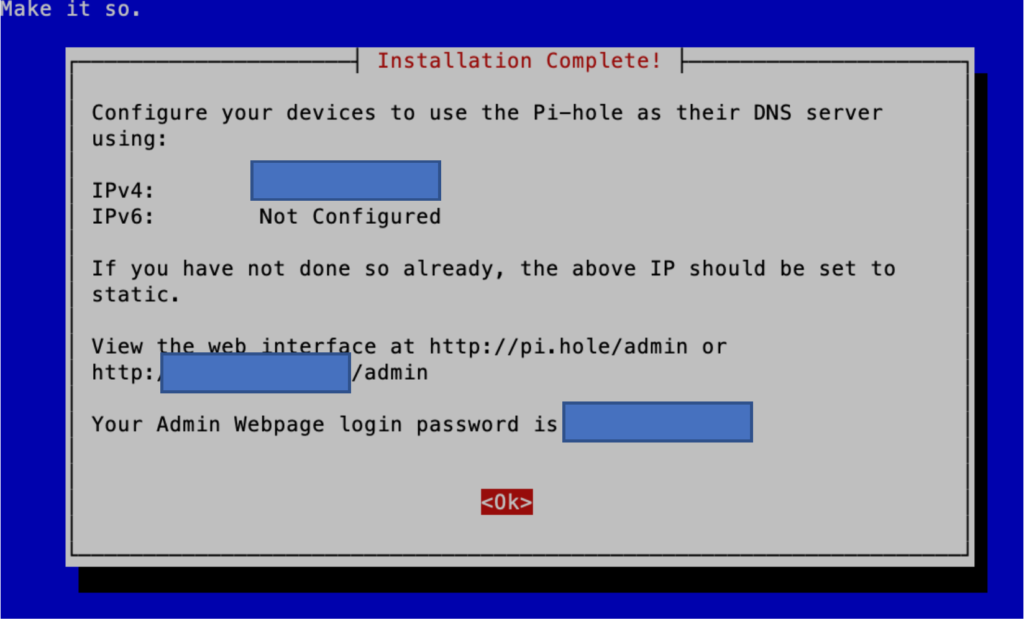
Change the web admin password in the terminal using the following command. You will be prompted to type in the password twice.
$ pihole -a -p

Open a web browser to the IP address of your Raspberry Pi, and type /admin. For our setup we went to http://IP address of Pi Hole/admin/
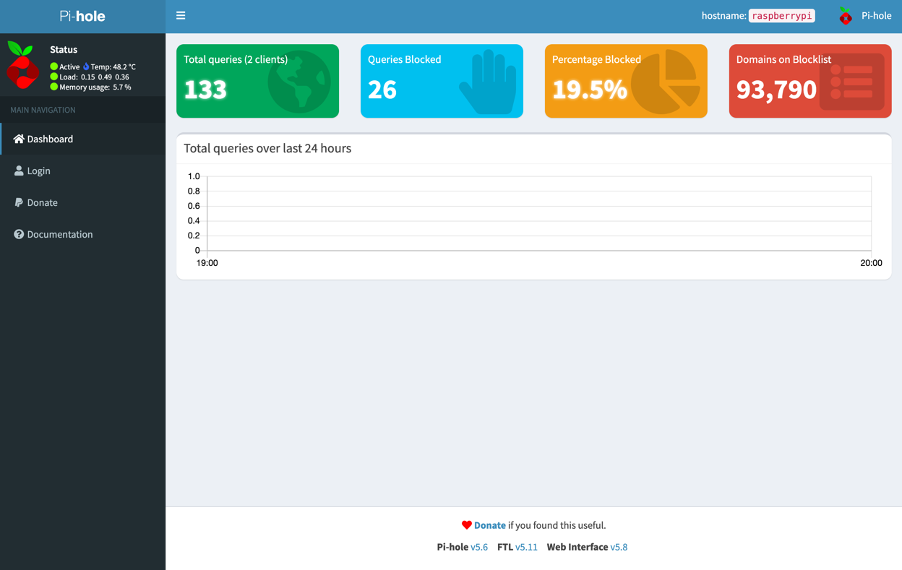
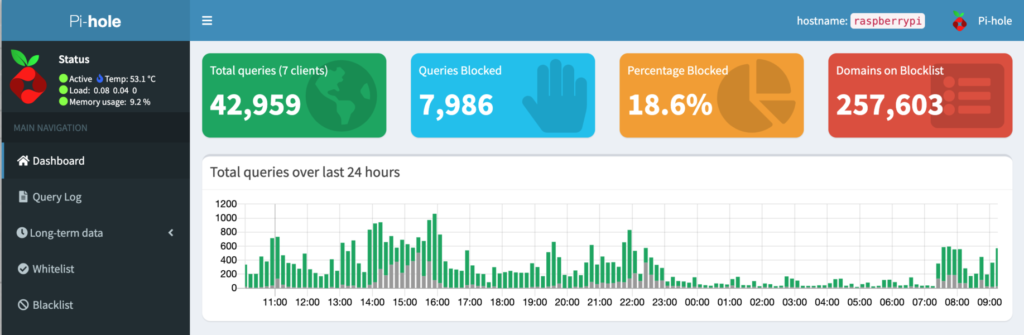
You now have access to the Pi Hole web interface/dashboard.
Point your devices to Pi Hole
Using iOS
Go to the settings menu

Press on the right arrow on the Wi Fi network, scroll down the settings to ‘configure dns’ and press on this.
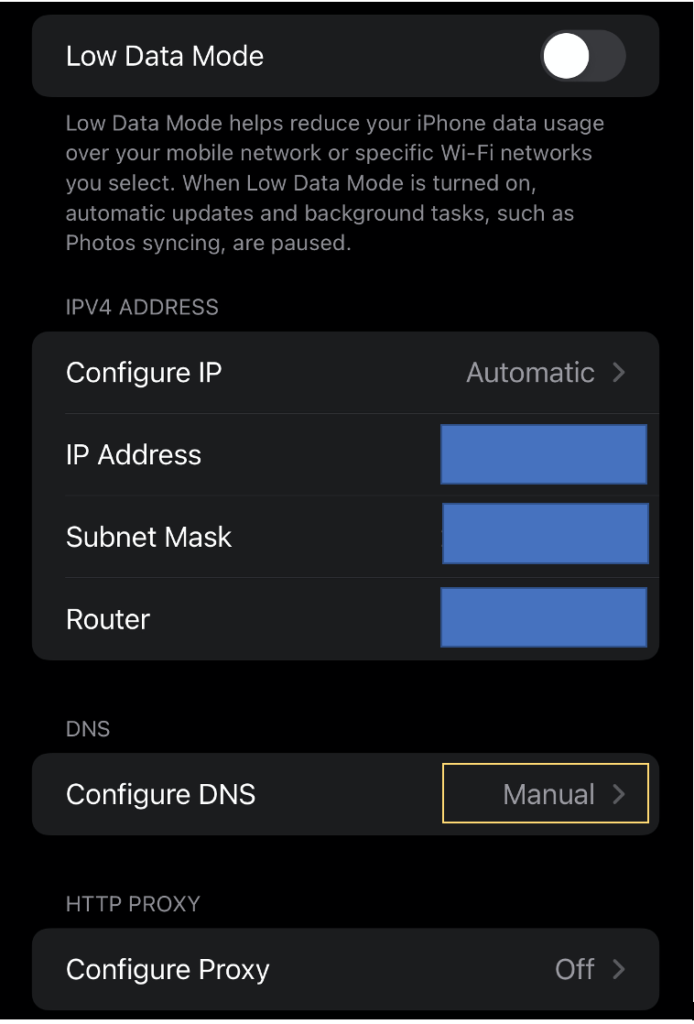
You will be given an option of changing your DNS server:

Choose the ‘manual’ option then add the IP address of the Raspberry Pi/Pi Hole as a server and save.
Using Android
This is based on the vanilla Android variant found in Pixel and certain other devices.
Go to the menu where you choose your Wi Fi network. Press on the pencil/edit sign to make a change
You will be presented with a menu like this:
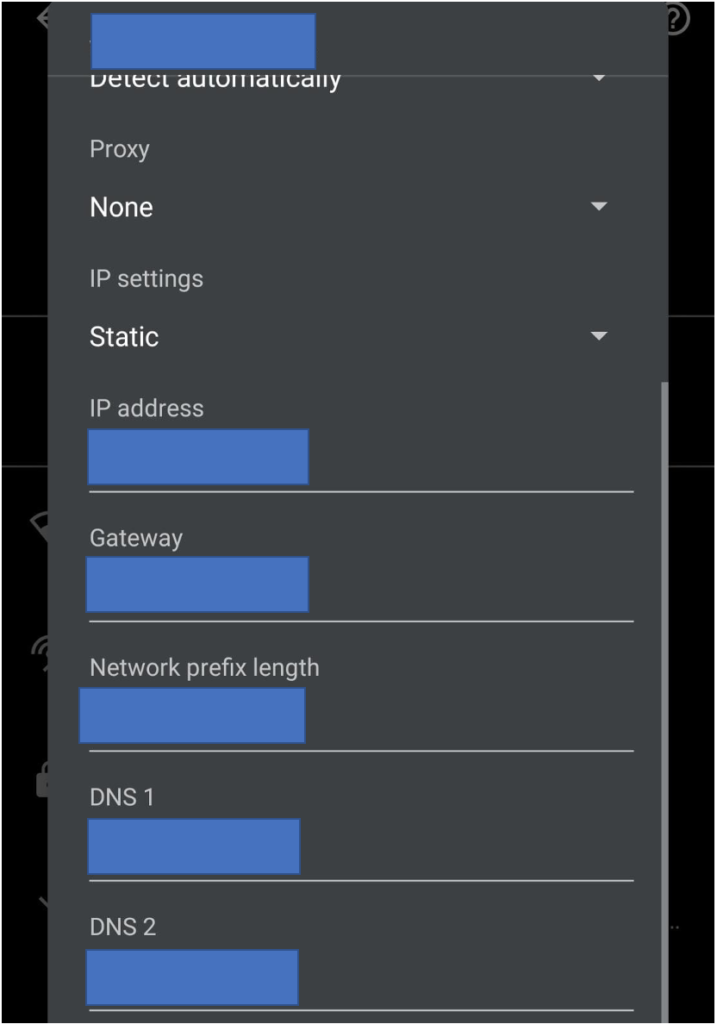
Change the DNS Server to the IP address of the Raspberry Pi.
These steps can be duplicated for Windows 10 and MacOS systems too. Google is your friend in this instance.
The next part will cover installing an Ubuntu Server in the cloud and installing Splunk on that server.